Wellness I Asked AI to Plan My Wellness Routine. Here’s How It Went. Can a chatbot teach me healthy habits? Let's see. April 26, 2024 April 24, 2024
Recipes This Is the Only Salmon You’ll Ever Need, Plus Other Dishes from L.A.’s Hottest Modern Middle Eastern Restaurant Stellar recipes to cook now. April 25, 2024 April 24, 2024
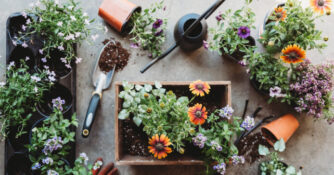
Garden Basics Put Down the Coffee Mug, Here’s What a Gardener Really Wants for Mother’s Day We've got the garden editor- (and real-life mom) approved gifts for all the outdoor-loving ladies in your life. April 25, 2024 April 27, 2024
Food & Drink This Is Exactly What to Order at the Best Ice Cream Shops in the West You're going to want to try them all. July 14, 2023 July 23, 2023
Home & Garden Here’s How the Big Realtor Settlement Will Change Home Buying and Selling You might want to put your house on the market ASAP. April 25, 2024 April 24, 2024
Food & Drink The Viral Grocery Shopping Method That Can Save You Time and Money Try this on your next trip to the market. April 24, 2024 April 27, 2024
Home Tours This Designer Did Something Very Controversial to Her Eichler Home—But for a Good Reason It was a necessary fix for her family. April 24, 2024 April 25, 2024
Recipes 20 Kid-Friendly Recipes That Will Save Your Weeknights Say hello to the Clean Plate Club. April 23, 2024 April 22, 2024
Travel This Wyoming Dude Ranch Is the Ultimate Throwback Wild West Vacation A new generation of ranchers are offering guests a transformative taste of the West at Reid Creek Lodge. February 12, 2024 February 9, 2024
Gifts & Shopping Get the ‘Cowboy Carter’ Look with the Best Cowboy Boots Made in the West From the release of Beyonce's new Cowboy Carter album to the enduring power of Yellowstone, here's how to get the look of the new West. March 29, 2024 April 1, 2024
Hotels Dude, Where’s My Ranch? These Getaways Reinvent the Iconic Western Vacation These recently opened ranch retreats offer amenities for the new generation. February 22, 2024 February 23, 2024
Edible Gardening Take a Tour of the Dreamiest California Take on a French Kitchen Garden The "homestead" garden is hardworking and beautiful. April 16, 2024 April 12, 2024
Garden Basics These Apps Will Help You Become a Better Gardener No green thumb yet? No worries. April 17, 2024 April 19, 2024
Garden Basics Spring Is Go-Time for Gardening—Don’t Forget These Garden Tasks to Set It up for Success Here's your spring garden checklist. March 12, 2024 March 28, 2024
Garden Basics This Common Pantry Staple Will Save Your Spring Garden Your evening tea just might save you some headaches—here's how to use it. April 11, 2024 April 10, 2024
Insider Guides A Local Chef’s Tips for Having a Classic Weekend in Downtown L.A. Chef Sujan Sarkar shares his favorite spots. April 22, 2024 April 19, 2024
Insider Guides How to Do Moab, According to an Outdoor Adventure Guide A local shares her tips for exploring this quirky town. April 18, 2024 April 22, 2024
Insider Guides How to Have a Perfect Beachy Weekend in La Jolla, According to a Local Surfing Instructor What to do, see, eat, and drink in this charming enclave of San Diego. April 1, 2024 April 10, 2024
Insider Guides A Maui Local Tells Us Where to Travel on the Island Now These spots highlight the unique lifestyle and charm of the region. February 26, 2024 April 10, 2024
Insider Guides This Is the Ultimate Canadian Rockies Luxury Getaway, According to a Local What to eat, drink, and do in this winter wonderland. February 5, 2024 January 31, 2024
Insider Guides Where to Get Your Wellness on in Venice, California The best spots to visit in the nexus of L.A.'s wellness community and its neighboring cities. January 29, 2024 February 6, 2024
Home Tours This Oakland Kitchen’s Makeover Was Inspired by the Homeowner’s Late Mother It’s a beautiful space that balances old and new. April 17, 2024 April 22, 2024
Decorating & Design These Maximalist Renter-Friendly Room Transformations Are Taking Over TikTok Here's how to rent with style. April 15, 2024 April 15, 2024
Decorating & Design How to Make the Perfect Bed, According to Hospitality Pros It's all about layering. April 15, 2024 April 16, 2024
Decorating & Design 9 Bunk Bed Ideas That Are Anything But Juvenile Sweet dreams are made of these… April 11, 2024 April 5, 2024
Decorating & Design The One Area That Could Increase the Value of Your Home Plus, the key features linked to speedy home sales. April 12, 2024 April 27, 2024
Home Tours This Luxurious Travel Trailer Has Better Interior Style Than Most Homes It was designed like a permanent, high-end dwelling, perfect for off-grid living. April 10, 2024 April 10, 2024
The Only Way to Bake a Salmon This salmon dish shines at any temp; it’s just as much a star set out cold for breakfast as it is served straight from the oven for dinner. April 23, 2024 April 27, 2024
Perfect Smashed Potatoes Simmer-smash-crisp, the holy trinity of root vegetable cooking techniques, never fails to deliver. April 23, 2024 April 27, 2024
Can’t-Take-It-off-the-Menu Cucumber Salad This salad’s enduring popularity on the Kismet menu proves, year after year, that cucumbers are universally loved. April 23, 2024 April 27, 2024
Spaghetti with Spring Peas and Shrimp Scampi Spaghetti and Shrimp Scampi has become a classic combo in the line-up of American pasta dishes. March 19, 2024 March 23, 2024